


Thank you to everyone who tuned into my live video! Now, let’s dig into what we talked about!
A few weeks ago, I wrote about the ticker tape in my brain - that endless scroll of house projects and decisions that wouldn’t stop running until I put them on a wall. If you haven’t read that essay yet, start there. It’s the why. This is the how.
What I didn’t get into in that piece is that there are actually two tools I use, and for an embarrassingly long time, I thought they were the same thing. They’re not. They solve different problems, and knowing which one to reach for is half the battle.
So let’s talk about both, then I’ll walk you through exactly how to build your own - whether you want a $2 posterboard version or a mounted whiteboard that lives on your office wall permanently.
Here’s what’s inside this week’s The Deeper Stuff post:
Table of Contents
Two Matrices, Two problems
The Eisenhower Matrix
The Impact-Effort Matrix
When to Use Which
Build Your Own: Three Options
Option 1: The Quick and Dirty (Under $5)
Option 2: The Permanent Installation (Under $50)
Option 3: The Digital Build (Free to ~$15/month)
What Goes on the Post-its
Let AI Help You Prioritize
What I’m Prioritizing This Week

Two Matrices, Two Problems
The Eisenhower Matrix
is what most people picture when they hear “prioritization grid.” Two axes: importance and urgency. Four quadrants: Do First (important + urgent), Schedule (important + not urgent), Delegate (urgent + not important), and Delete (not important + not urgent).
This is the tool you reach for when you personally are drowning in tasks and need to decide where to spend your limited time. It’s a triage tool. You’re the constraint.
The name is an homage to Dwight Eisenhower (the general, the president, the guy who designed D-Day), but the two-by-two grid was actually popularized by Stephen Covey in The Seven Habits of Highly Effective People. Eisenhower’s original insight was simpler and honestly kind of perfect: “I have important tasks and urgent tasks, but I rarely have both.”
The Impact-Effort Matrix
looks similar but solves a different problem. Two axes: impact (how much value does this deliver?) and effort (how many resources does it consume — time, money, energy?). Four quadrants: Quick Wins (high impact, low effort), Major Projects (high impact, high effort), Fill-Ins (low impact, low effort), and Thankless Tasks (low impact, high effort).
This is the tool you reach for when you have a pile of ideas or projects and limited resources to throw at them. You’re not triaging your day; you’re deciding where to invest. The distinction matters.
These matrices came out of post-war Japan, from companies like Toyota that were rebuilding with almost nothing. The whole point was: we cannot afford to waste time or money on bad ideas. Every resource has to go toward maximum value. That constraint-driven thinking is the DNA of Lean, and it’s why this tool feels so natural when you’re staring at a home renovation budget or planning a birthday party on a Tuesday night after the kids are in bed.
When to Use Which
Here’s my shorthand:
Eisenhower when the problem is you don’t know what to do first. You’re one person with a finite number of hours. The roof is leaking, the concrete steps are crumbling, you need masonry screws, and you’ve been on Etsy for 40 minutes looking at hand-carved house number placards. (Guess which quadrant that last one falls into.)
Impact-Effort when the problem is you have more ideas than resources. You’re launching a business and need to decide between filing your LLC, building a website, designing a course, and tweaking the borders on a flyer you’re going to print 50 copies of. Or you’re planning a five-year-old’s unicorn birthday party and weighing a giant balloon (quick win) against hand-stamped goodie bags for 15 kids (thankless task, trust me on this one).
Sometimes you need both. For the house, I started with an Eisenhower Matrix to figure out what to do first (the roof, because everything else depended on it). Then I used an Impact-Effort lens when I was deciding which DIY projects to tackle on weekends, because my resources (time, budget, energy after chasing a toddler) were the real constraint, not urgency.

Build Your Own: Three Options
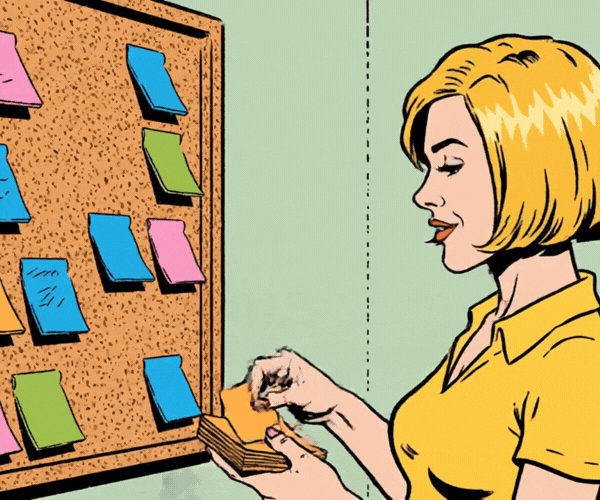
Option 1: The Quick and Dirty (Under $5)
This is what I used the day I built my first board. Snow day. Baby napping. Forty-five minutes of sanity.
What you need:
A piece of posterboard (I grabbed mine from Michael’s for a few bucks, but a dollar store works too). A Sharpie. A pack of Post-it Notes in at least three colors.
That’s it.
What you do:
Draw your two axes with the Sharpie. Label your quadrants. If you’re doing an Eisenhower, that’s Important/Not Important on one axis, Urgent/Not Urgent on the other. If you’re doing Impact-Effort, it’s Impact (high/low) and Effort (high/low).
One project per Post-it. Keep it high level; this is a thinking tool, not a project plan. For the Eisenhower, I write the project name and maybe a one-line note about why it’s urgent or important. For Impact-Effort, I’ll add a rough cost if money is the binding constraint (”~$2K” or “” or even just “$” vs. “$$$” — whatever helps you see the relative weight).
Color-code by who does the work. In my house matrix, green was contractor, orange was contractor plus me, pink was all me. You could also color-code by room, by family member, by timeline; whatever axis helps you see a pattern you couldn’t see before.
Tape it to the wall. Stand back. Breathe.
You can also skip the posterboard entirely and just tape four pieces of paper to the wall in a grid. Honestly, the medium does not matter. What matters is that the information leaves your head and becomes visible.

Option 2: The Permanent Installation (Under $50)
If you’re someone who needs this board to live on your wall for months (or years, let’s be real), invest a little more in the setup.
What you need:
A whiteboard from any office supply store. I’d go at least 24” x 36” so you have room to move things around. A pack of thin electrical tape, which makes cleaner, straighter grid lines than a marker and won’t smudge when you bump it. Small Post-its or whiteboard magnets with writable surfaces. A few dry-erase markers in different colors for labeling the axes and quadrants.
What you do:
For mounting, you can lean it against the wall on a shelf or desk (totally fine for a home office). Or mount it properly with brackets, which you can grab at Home Depot or any hardware store. If you want it to look intentional rather than like a leftover from a conference room, add a simple frame around it. Home Depot sells lightweight moulding that you can cut to size and paint or stain; it turns a generic whiteboard into something that looks like it belongs in your office.
The electrical tape is the real trick here. Use it to create your grid lines. It’s thin, it sticks well to a whiteboard surface, it peels off clean when you want to reconfigure, and it looks sharp. One vertical line, one horizontal line, four quadrants. Done.
This version is a living document. Post-its move as priorities shift. New ones go up when the next surprise arrives (and it will). Old ones get peeled off and tossed when a project is done. This is a project on my short list, to build one in my office where I can see it from my desk, which means I never have to hold the full picture in my head. It’s already on the wall.

Option 3: The Digital Build (Free to ~$15/month)
If you want to share your board with a partner, or if you just prefer digital tools, there are several solid options. Here’s how I’d think about choosing between them.
Microsoft Whiteboard comes free with any Microsoft 365 subscription. If you’re already in the Microsoft ecosystem, this is the easiest entry point. It has infinite canvas, sticky notes, and templates (including a basic 2x2 grid). You can share it with anyone who has a Microsoft account. The collaboration is real-time, so you and your partner can both move Post-its around simultaneously. The downside: it’s a little clunky on mobile, and the template options are limited compared to dedicated tools.
Miro is probably the most popular digital whiteboard for this kind of thing, and the free tier gives you three boards. The interface is intuitive, the sticky note functionality is excellent, and there are tons of pre-built templates for both Eisenhower and Impact-Effort matrices. Real-time collaboration works well. It’s genuinely fun to use. The downside: it can feel like overkill for a simple 2x2, and if you need more than three boards, you’re looking at around $8-10/month. (Hint: you can also build multiple matrices on different “pages” in the same board!)
Lucidchart is more of a diagramming tool, but it handles matrices well if you want something that looks polished. The free tier is limited (a few documents, limited shapes), but the paid version (~$8/month) gives you a lot of flexibility. Best for people who want their matrix to look good - like, presentation-ready good. The downside: less “grab a sticky and move it” energy, more “build a diagram” energy. If you want the quick, tactile feel of Post-its, this isn’t it.
Google Slides or Microsoft PowerPoint — hear me out. If you don’t want to learn a new tool and you already use one of these, you can build a perfectly functional matrix in a slide deck. Draw a 2x2 grid, drop in text boxes as your “Post-its,” color them however you want, and share the file with your partner. It’s not fancy, but it works, it’s free (Google Slides) or included with your existing subscription (PowerPoint), and there’s zero learning curve. The downside: no real-time sticky-note feel, and moving things around is a little more cumbersome than a dedicated whiteboard tool.
My recommendation: If you’re doing this solo and want it simple, use Google Slides or Microsoft Whiteboard. If you’re sharing with a partner and want it to feel collaborative, use Miro. If you want it to look beautiful, use Lucidchart.

What Goes on the Post-its
Keep them high level. This is a thinking tool, not a project management system. If you find yourself writing paragraphs on a Post-it, you’re overcomplicating it.
For an Eisenhower Matrix, each Post-it should have the project or task name and (optionally) a short note about what makes it urgent, important, or neither. “Fix roof — water damage getting worse” tells you everything you need to know about why it’s in the Do First quadrant. “Browse Etsy for house numbers” barely needs a note; just seeing it written down might be enough to make you laugh and move on.
For an Impact-Effort Matrix, include a rough sense of cost or resource commitment if that’s your constraint. You don’t need exact numbers. I use a simple dollar-sign scale ($, ,$, ) or a time estimate (”one weekend” vs. “three months of contractor work”). The point is to make the relative weight visible so you can compare across the board. A $200 project and a $15,000 project feel very different when they’re sitting next to each other, even if they’re both in the “Major Projects” quadrant.
Some other things that are useful to capture on the Post-it, depending on your situation: who does the work (you, a contractor, your partner, a combination), any dependencies (”can’t start until roof is done”), and a rough timeline if one exists. But again, keep it to a few words. The board is for seeing the big picture, not for storing the details.

Let AI Help You Prioritize (…I did the hard work for you)

